
From the opening months of the World War I, Flanders was the decisive sector for the British Army. It was in an around the medieval Belgian town of Ypres that the original BEF had decimated themselves fending off German attacks from October to December, 1914. Ypres and the salient surrounding it was where the British would see the hardest and most prolonged fighting of all the places where the British would fight in World War I.
The Battle of Messines Ridge fought from 7-14 June, 1914 was not really a separate battle at all but rather the opening phase of what would come to be known variously as the Third Battle of Ypres or Passchendaele.

The Messines Ridge is on the southern shoulder of what was then the Ypres salient. It is commanding terrain the possession of which allowed the German army to see almost all the way into the center of the city of Ypres itself and observe British movements inside the salient allowing the Germans to target British concentrations of troops very accurately.
The Ridge itself is not very high, about 90 feet, but that was more than high enough for military purposes given the flat nature of the terrain in Flanders near the coast. I never fully appreciated the advantage to be gained from possession of a 90 foot ridge-line until my first visit to the battlefield in 2004 while on R&R from my tour in Iraq. In Flanders a 90 foot difference in elevation makes all the difference in the world.
Possession of the Messines Ridge would allow the British to deny observation of a significant portion of their rear area to the German army and would also serve as an excellent stepping off point for follow on offensive operations both to expand the salient and effect the ever elusive breakout that all generals from any side fervently wished for.
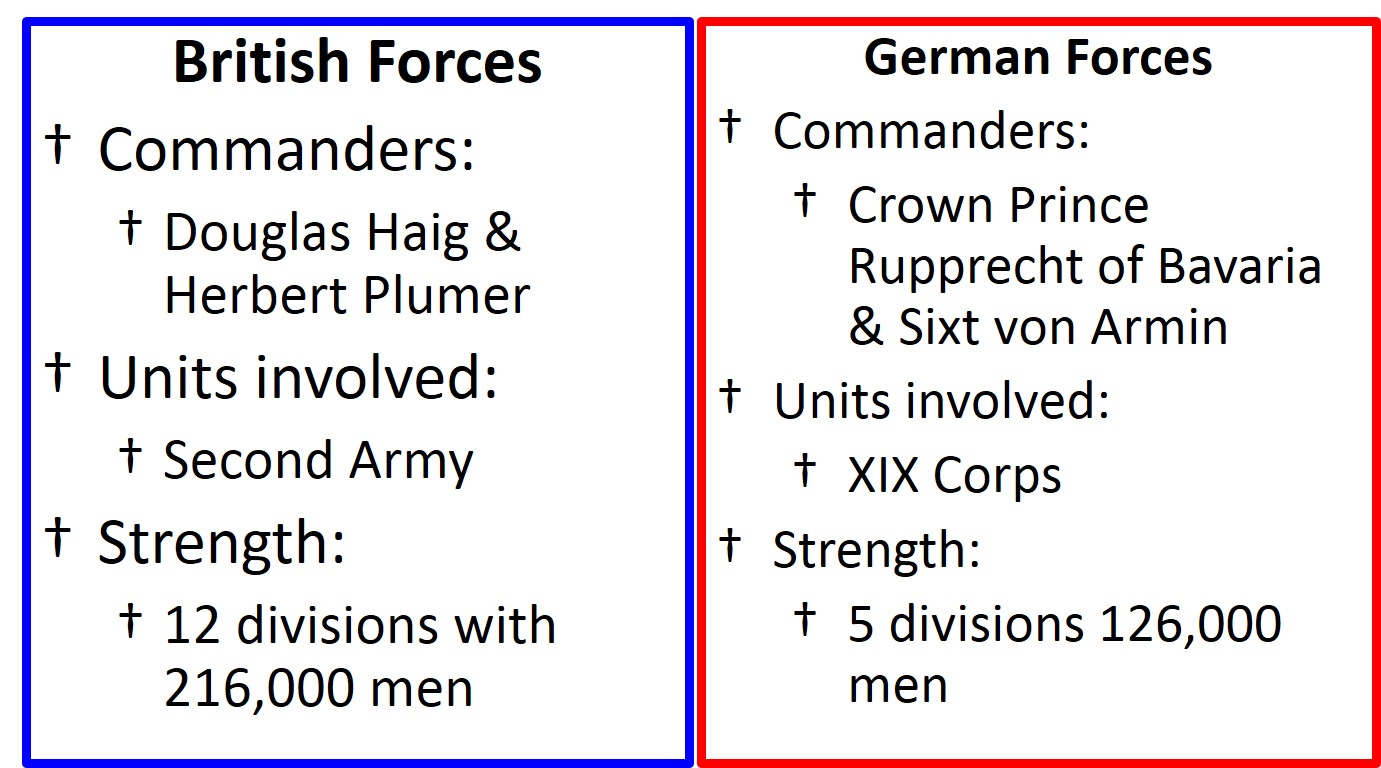
The immediate commander and primary planner for the British forces in the lead-up to Messines Ridge was Gen. Herbert Plumer who had the unfortunate reputation with Haig of being a plodder. Plumer reputation among the troops however was different. He was on of the few British generals who the troops adored or even loved because of his well-known concern for their welfare and desire to avoid excessive casualties.
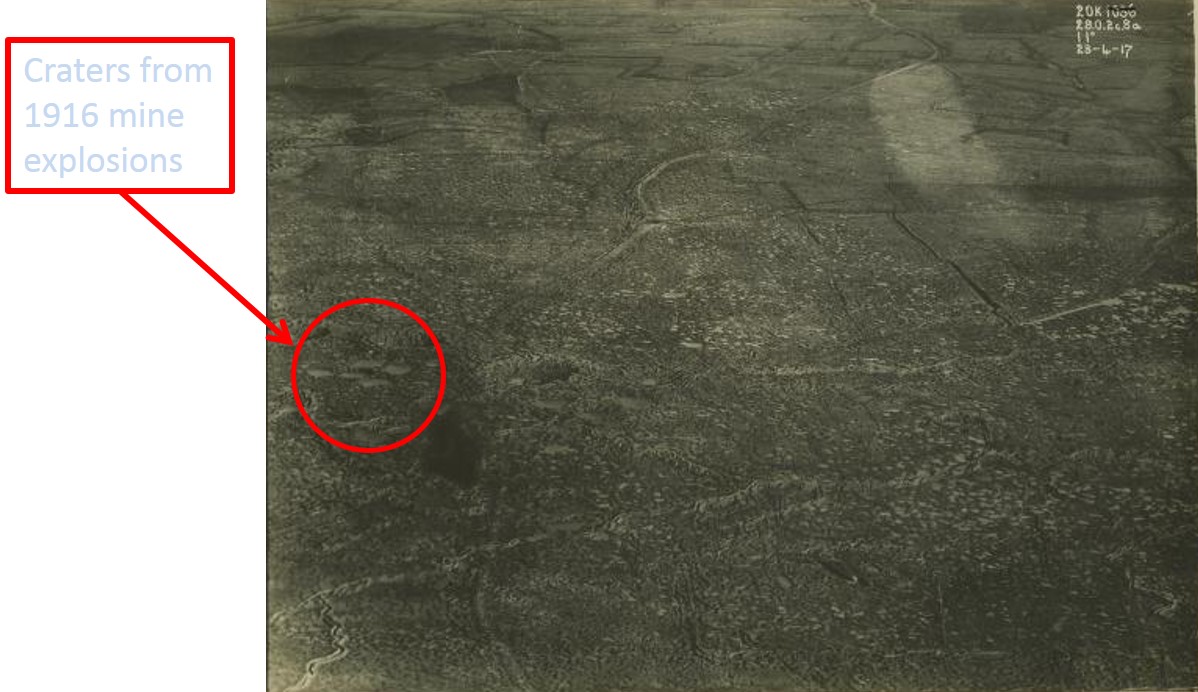
The plan Plumer came up with to take the ridge entailed the explosion of 25 mines that the Royal Army had laboriously emplaced under the ridge in the months leading up to the commencement of the offensive. The mines ranged in size from the 96,500 lb St. Eloi mine to the 30,000 lb Petit Bois mines. These were set to essentially demolish and demoralize the German front line trenches whereupon the British troops were expected to easily occupy them before the stunned Germans could react and throw them out.
A creeping barrage by 2/3 of the 2,200 artillery pieces available was to “shoot the attacking infantry in” once the mines exploded. The rest of the artillery was reserved for use in the counter battery role to suppress German artillery to a depth of 9,000 yards along the attack front.
A preliminary bombardment lasting almost two weeks was also planned for the preparing the battlefield and hindering the Germans from reinforcing the sector to be attacked. (NOTE: preliminary bombardments of this style were not meant so much to destroy defensive works so much as to demoralize the enemy, injure defenders, and keep the enemies head down allowing attacking infantry to assault when the time came)
The Messines battle was the opening act of what was ultimately planned to be a British rupture of the German defenses in Flanders. The overall plan failed.
At approximately 3:10 a.m. on the morning of June 7th, 1917 19 of the 25 emplaced mines exploded. The 4 Birdcage mines were not detonated because the Germans had already evacuated the area by Zero-Hour and two failed to explode. The mines were wildly successful and the British troops did indeed essentially waltz into the German positions and establish occupancy.
The Germans attempted to counterattack on day one but they were unable to keep the British from occupying and holding the entirety of the first three lines of German trenches except for a portion of their third line which they retook from II ANZAC Corps.
On the morning of 8 June the II ANZAC Corps retook the section of the German third line they had been ejected from. The rest of the British assault divisions set about consolidating the defenses in the newly won positions while the British artillery provided disrupting fire on German counterattacks while a portion of the artillery was displaced forward.
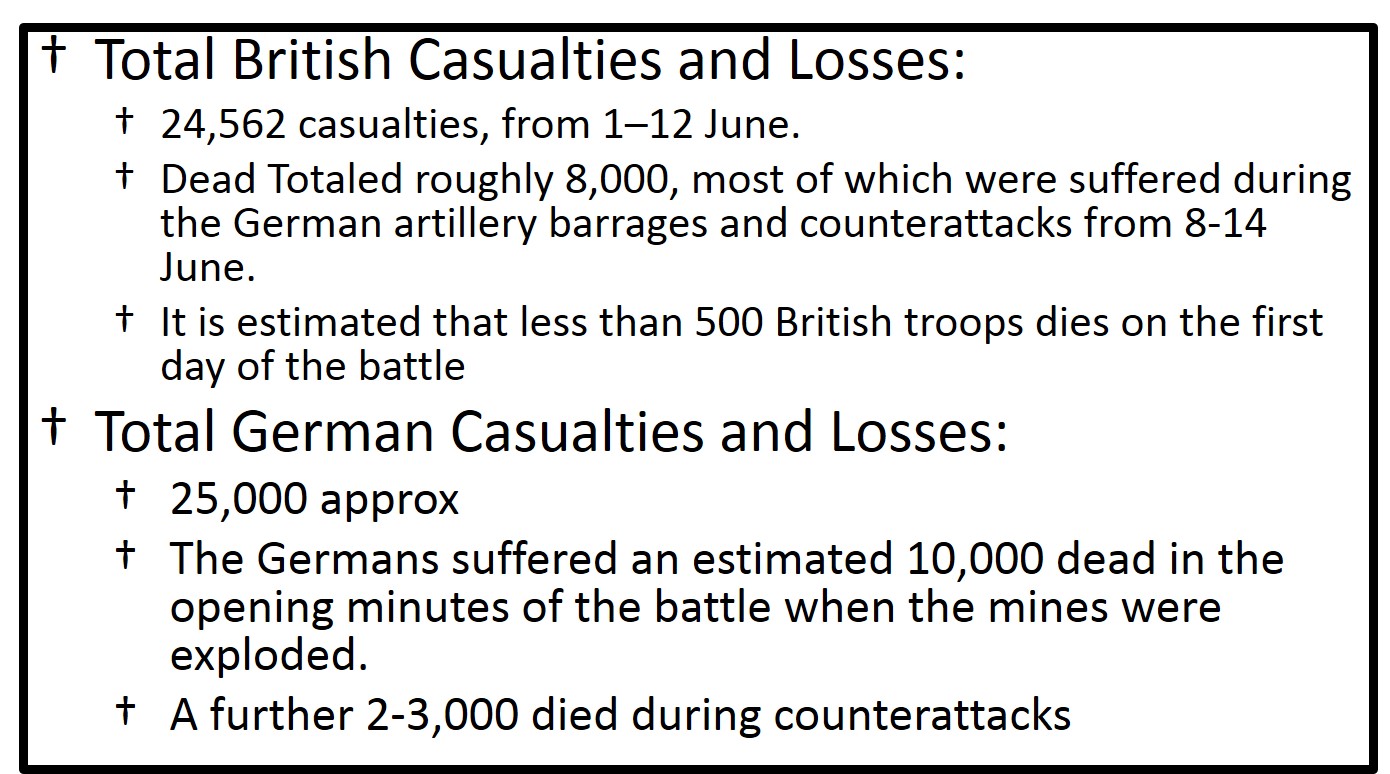
German artillery unleashed a massive bombardment on the captured trenches during which it is estimated that the British suffered up to 90% of their casualties during the battle.
Once large-scale German counterattacks stopped on 14 June the Messines sector settled down until the Passchendaele battle restarted active fighting in the beginning of July.
The Battle for Messines Ridge was one of the few arguably successful offensives of World War I prior to the offensives of the Last Hundred Days in 1918.